Best Recessed Lights for Low Ceilings: Transform Your Space Without Losing Height
Disclosure: This post may contain affiliate links. We may earn a commission on qualifying purchases at no extra cost to you.
I still remember standing in my basement office one afternoon at 3 p.m., staring up at that single overhead light fixture wondering why the whole room felt like a cave. The ceiling was just under 8 feet—original 1970s drywall—and I desperately wanted the space to feel warm and productive, not cramped. That’s when I learned that low-ceiling rooms aren’t hopeless. They just need the right lighting strategy. Turns out, recessed lights, when you choose the shallow kind, can completely transform the space.
Top Picks: Shallow Recessed Lights for Your Low-Ceiling Room
Best Overall
Built exactly for what you need: 2–4 inches of clearance, IC-rated so they’re safe in insulated ceilings, and dimmable to shift from bright morning focus to cozy evening mode. Warm white (2700K) keeps the room intimate instead of feeling like a dentist’s office. Perfect for basements, attics, bathrooms, and bedrooms with dropped ceilings.
Best Value
Don’t want to rewire everything? Retrofit kits snap into your existing fixtures or junction boxes with barely any fuss. These shallow LED discs sit flush and save serious energy compared to old incandescent bulbs—often 70%+ savings, though exact numbers depend on your current setup and how much you use the room. Great if you’re renting, testing out a new lighting layout, or want to avoid calling an electrician.
Premium Pick
Some shallow fixtures have gimbal mounts or adjustable housings that let you angle light exactly where you want it—highlight a feature wall, showcase paint color, or brighten your workspace. Costs more, but adds both visual interest and practical flexibility without eating up your clearance. Ideal if you have an office, kitchen island, or accent wall worth showing off.
Why Low-Ceiling Rooms Need Special Lighting
Standard recessed lights are built for 9-foot-plus ceilings. They need 6 to 8 inches of space above the drywall—between ceiling and joist—just to squeeze the fixture housing up there. When you’re already fighting for headroom, that’s simply not going to happen.
Shallow-mount recessed lights solve this completely. The whole thing—socket, housing, trim ring—fits into just 2 to 4 inches. So even in a basement with 7.5 feet of clearance, you can add proper recessed lighting without ripping out joists or rerouting ducts.
And here’s the design bonus: recessed lights sit completely flush with your ceiling. No bulky fixtures hanging down like something from the 1980s. That clean ceiling line makes the whole room feel taller and more open—a subtle trick but one that actually works.
Shallow Recessed Lights vs. Other Low-Ceiling Options
| Option | Ceiling Clearance Needed | Typical Cost Range | Best For |
|---|---|---|---|
| Shallow Recessed Lights | 2–4 inches | $80–$200+ per unit (LED, varies by brand and features) | Maximum headroom, clean look |
| Flush-Mount Fixtures | 0 inches (sits on ceiling) | $40–$150 (check current pricing) | Renters, quick updates |
| Track Lights | 3–6 inches | $60–$300+ per fixture (varies widely) | Accent lighting, adjustable aim |
| Pendant Lights | 6+ inches (hang down) | $50–$250+ (check current options) | Islands, seating areas (eats headroom) |
| Ceiling Fan Lights | 9+ inches | $120–$500+ (varies by model) | Ventilation + light (needs clearance) |
See the pattern? To keep a low ceiling from feeling suffocating, shallow recessed lights hit the sweet spot. They use almost no space, cost less than pendants or track systems, and work with pretty much any design style you throw at them.
Key Features to Look For
IC-Rated Housing (Insulation Contact)
Look at the label. Does it say IC-rated? That’s your green light—it means the fixture is safe to install right against insulation in the attic or joist area above. Not all shallow fixtures carry this rating, and putting a non-IC fixture into insulation is a fire risk and wastes your heating and cooling energy. This is non-negotiable. Check before you buy.
LED, Not Halogen or Incandescent
LED shallow recessed fixtures cost a bit more upfront, but they run cooler (safer in cramped spaces), last roughly 25,000 hours or more (check your specific product), and use a fraction of the electricity. Halogen runs hot and can be risky in tight insulated cavities. Incandescent is basically obsolete at this point. LED is the only way to go here.
Dimmable Options at 2700K
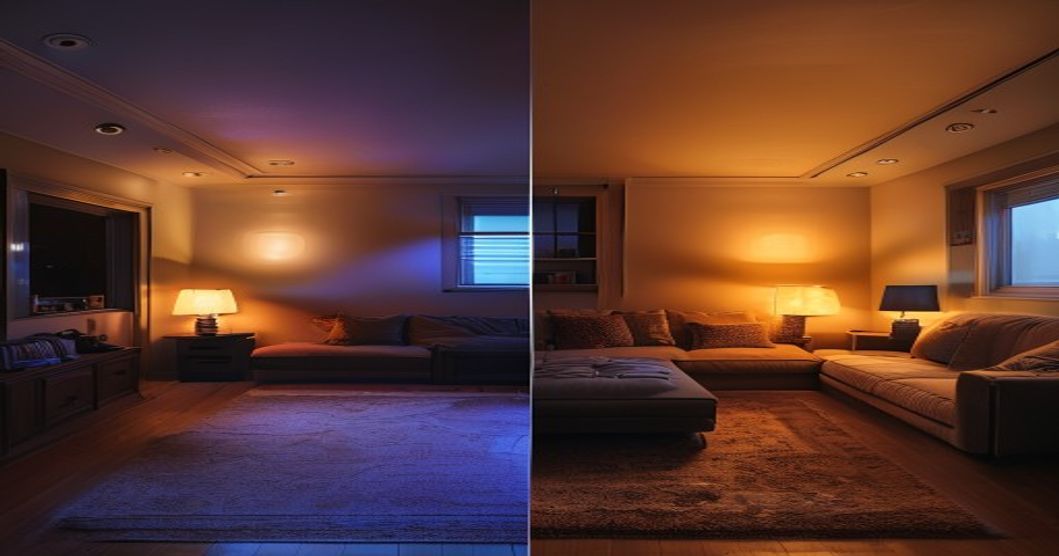
2700K is that warm, slightly golden-toned light that makes a low-ceiling room feel cozy instead of clinical. Pair it with dimmable circuitry (make sure your fixture works with standard dimmers) and you can shift brightness through the day—bright for morning work, dim for evening coziness. That flexibility is worth the small price bump.
Trim Style: Flush or Minimal
Pinhole trims and deep architectural downturns cast shadows and add depth—the last thing a low-ceiling room needs. Stick with flush trim or baffle rings that sit flat and spread light evenly. If you want any design detail, go with a brushed nickel or matte black finish on a simple ring, nothing that sticks out.
How to Plan Your Layout
Spacing makes more difference than you’d think. I’ve seen basements with four scattered fixtures where the corners stay dim, and others with eight in a grid where everything glows evenly and warmly.
The Grid Method
Divide your room into a grid. For a 10-by-12-foot room, space fixtures about 4 to 6 feet apart in each direction. That usually means 6 to 9 fixtures depending on the actual layout. Closer spacing (4 feet) looks polished and eliminates shadows and hot spots; wider spacing (6+ feet) saves money but can look spotty in a tight, compact room.
Distance from Walls
Keep fixtures 12 to 18 inches away from the walls. Get too close, and light pools unevenly right near the edge; go too far out, and dark shadows appear along the baseboards. Twelve inches from the wall is a solid starting point.
Avoid Clustering
Don’t bunch all your lights in the middle of the ceiling. It defeats the whole point and makes the room feel heavier at the bottom. Spread them out so light reaches every corner—kitchen, desk area, seating spot, even the edges—without any one area dominating.
Installation and Wiring Reality Check
Here’s the honest part: DIY recessed lighting can work if you’re comfortable running electrical wire through your joists, but it’s not a one-afternoon job.
New Construction: This is the easiest scenario. Run new wiring while you’re framing, before drywall closes everything in. Rough-in is straightforward; once drywall is up, trim work takes an hour or two per room.
Finished Ceilings (Retrofit): This gets harder. You either cut access holes in the ceiling (hidden by trim later), fish wire through existing cavities (tedious and frustrating), or install surface raceway (visible conduit that usually looks rough). Most people call an electrician for this part. It costs more upfront but saves you headaches, code mistakes, and fire hazards.
Retrofit Kits: The middle road. Shallow LED retrofit discs snap into existing junction boxes or clip in place once you cut a hole. No new wiring. Not as clean as a purpose-built installation, but quick and low-risk.
Check your local electrical code first. Call your city or county building department and ask if permits and licensed electrician sign-off are required. It varies by jurisdiction.
Pros and Cons of Shallow Recessed Lights
- Only 2–4 inches of clearance—perfect for tight rooms
- Flush with ceiling, no visual clutter or weird sagging
- LED options save energy and last forever (typically 25,000+ hours; check product specs)
- Dimmable and warm-color choices keep things cozy
- Retrofit kits exist for renters or existing ceilings
- IC-rated options are safe in insulated cavities
- More affordable than pendant or track setups
- Retrofit installation in finished ceilings is tedious and often needs a licensed electrician
- Bad spacing or placement leaves dark corners or spotty coverage
- IC rating is critical but not always obvious on the label—easy to grab the wrong one
- Dimmable fixtures sometimes clash with older dimmer switches
- Can’t go in uninsulated attics unless you use uninsulated-space-rated fixtures
- Upfront cost varies by brand and features (check current prices), but higher than a single flush-mount (though long-term savings add up)
- Halo effect and glare if the trim is shiny or bulbs are too powerful
Who It’s For (and Who It’s NOT)
Perfect For:
- Basements. Finished or not, shallow recessed lights add brightness and polish without stealing headroom.
- Attic Bedrooms. Sloped ceilings and low spots are exactly what these fixtures handle.
- Bathrooms. Moisture-prone rooms with low ceilings need IC-rated fixtures; shallow LEDs keep the space from feeling crammed.
- Kitchens with Limited Height. Mobile homes, apartments, condos, or older houses with 7.5-foot ceilings benefit from shallow overhead fixtures paired with undercounter or soffit lights.
- Offices and Work Spaces. Dimmable shallow recessed lights reduce eye fatigue and create focus without lights hanging down in your face.
NOT a Good Fit For:
- Unfinished Joist Cavities (unless uninsulated). IC-rated fixtures work only in insulated cavities. If your attic is bare and you plan to add insulation later, standard shallow fixtures become a fire risk.
- Renters in a Rush. Permanent wiring takes weeks to permit and schedule. Retrofit kits or flush-mount fixtures are way faster.
- Accent or Feature Lighting Only. These lights excel at ambient brightness. For highlighting artwork or creating drama, adjustable track or pendant lights do it better.
- Textured or Decorative Ceilings. Recessed lights love smooth, flat drywall. Popcorn or textured ceilings make trim gaps obvious and installation messy.
Cost Breakdown and Long-Term Savings
A single shallow recessed LED fixture (housing, trim, dimmable socket included) runs $80 to $200+ depending on the brand and features. Check current pricing for what you’re actually buying. A full install in a typical 200-square-foot basement might need 6 to 8 fixtures, plus wiring, a new circuit breaker, and labor. Total: roughly $1,200 if you DIY with retrofit kits, up to $3,500+ for a professional installing new wiring in a finished basement. Real costs depend on your region and what the electrician actually has to do.
Once they’re in, LED shallow recessed lights are dirt cheap to run. A single fixture pulling about 9–12 watts (typical for LED shallow recessed; check your exact model) running 5 hours a day costs around $4–6 per year in electricity. Compare that to a 75-watt incandescent equivalent, which might run $45–60 per year under the same conditions, and the LED pays for itself in 2–4 years of regular use in many situations. After that, pure savings—plus no burnt-out bulbs every six months. Your actual results depend on your local electricity rates and how much you actually use the space.
If you’re staying in your home for five-plus years and use the room regularly, shallow recessed lights usually make financial sense both for comfort and monthly bills. Your specific results will vary based on usage and local rates.
Before You Buy: Checklist
- Measure Ceiling Height and Joist Depth. Know your exact clearance, then verify each fixture’s minimum depth requirement. Avoid surprises.
- Confirm IC Rating. If there’s insulation in your cavity, the fixture MUST be IC-rated. Check the label or spec sheet.
- Check Local Electrical Code. Call your building department. Ask if permits or a licensed electrician are required. Rules change by jurisdiction.
- Verify Dimmer Compatibility. Want dimmable fixtures? Test one first or buy from somewhere with a good return policy. Not every dimmer and LED driver get along.
- Plan Your Grid. Sketch your room and mark fixture positions before ordering. Prevents overbuy and dark corners.
- Choose Color Temperature Early. Warm (2700K) versus neutral (3000K) versus cool (4000K) completely changes how the room feels. Test samples at a showroom if you can.
- Read Reviews on Trims and Baffles. Some whistle or rattle; others collect dust. Check what real people say about the ones you’re considering.
Real-World Example: The Basement Transformation
My basement project taught me a lot. I started with one halogen recessed light left by the previous owner. It cast harsh shadows, ran hot, and made my 7-foot-8-inch ceiling feel cramped. I hired a licensed electrician, who ran a new 20-amp circuit and installed eight shallow LED recessed fixtures in a 4-foot grid with warm 2700K dimmers.
Cost: about $2,200 for fixtures and labor (costs vary by region and electrician rates). Time: one full day. The result? The room went from dim and cave-like to bright and actually inviting. Even lighting, no hot spots, and I can dim the lights down to 20% at night for a cozy reading vibe. Two years in, I haven’t changed a single bulb and the electric bill for that room hasn’t budged.
Would I do it again? Without hesitation. The upfront cost was real, but knowing the room will stay well-lit and efficient for 15+ years makes it an easy choice.
Related Reading
If you’re overhauling your whole lighting setup, read our guides on best pendant lights for kitchen islands and best smart bulbs for upgrading your space. Setting up a home office or study? Our best desk lamp guide pairs perfectly with recessed ceiling fixtures for solid task lighting.
Shallow recessed lights brighten low-ceiling rooms without stealing headroom or tanking your design. Pick dimmable LED fixtures in 2700K, check for IC rating on insulated ceilings, and space them 4–6 feet apart in a grid. Whether you go new fixtures or retrofit kits, you’re usually looking at solid returns in comfort, energy use, and long-term savings (your actual results depend on how much you use the space and your local electricity costs).
If your ceiling is under 8 feet and you’re done with dim or bulky lighting, shallow recessed lights are worth a serious look. Measure your clearance, check the codes, sketch your layout. Once you see that warm, balanced light filling the space, you’ll kick yourself for waiting.
Ready to go? Browse Amazon for shallow recessed LED light options and compare trims and color temperatures to match your room.
Affiliate Disclosure: This post contains affiliate links. As an Amazon Associate I earn from qualifying purchases. If you click a product link and make a purchase, I may receive a small commission at no extra cost to you. This helps fund the research and writing of articles like this one. Thank you for your support.